> ## Documentation Index
> Fetch the complete documentation index at: https://docs.valmi.io/llms.txt
> Use this file to discover all available pages before exploring further.
# Getting Started with Metering
> Set up your first agent and start tracking usage in four simple steps
## Getting Started with Metering
This guide walks you through setting up your first agent and seeing usage data in real-time. You'll create an agent type, deploy an instance, integrate the SDK, and view live metering data.
## Step 1: Create Agent Type
An agent type defines what kind of AI service you're offering. It's like a template that describes your agent's capabilities.
Navigate to **Agents > Types > Create New**. Fill in the form with your agent details. Give it a name like "OCR Agent" and a description that explains what it does. The type field identifies the agent framework or technology you're using.
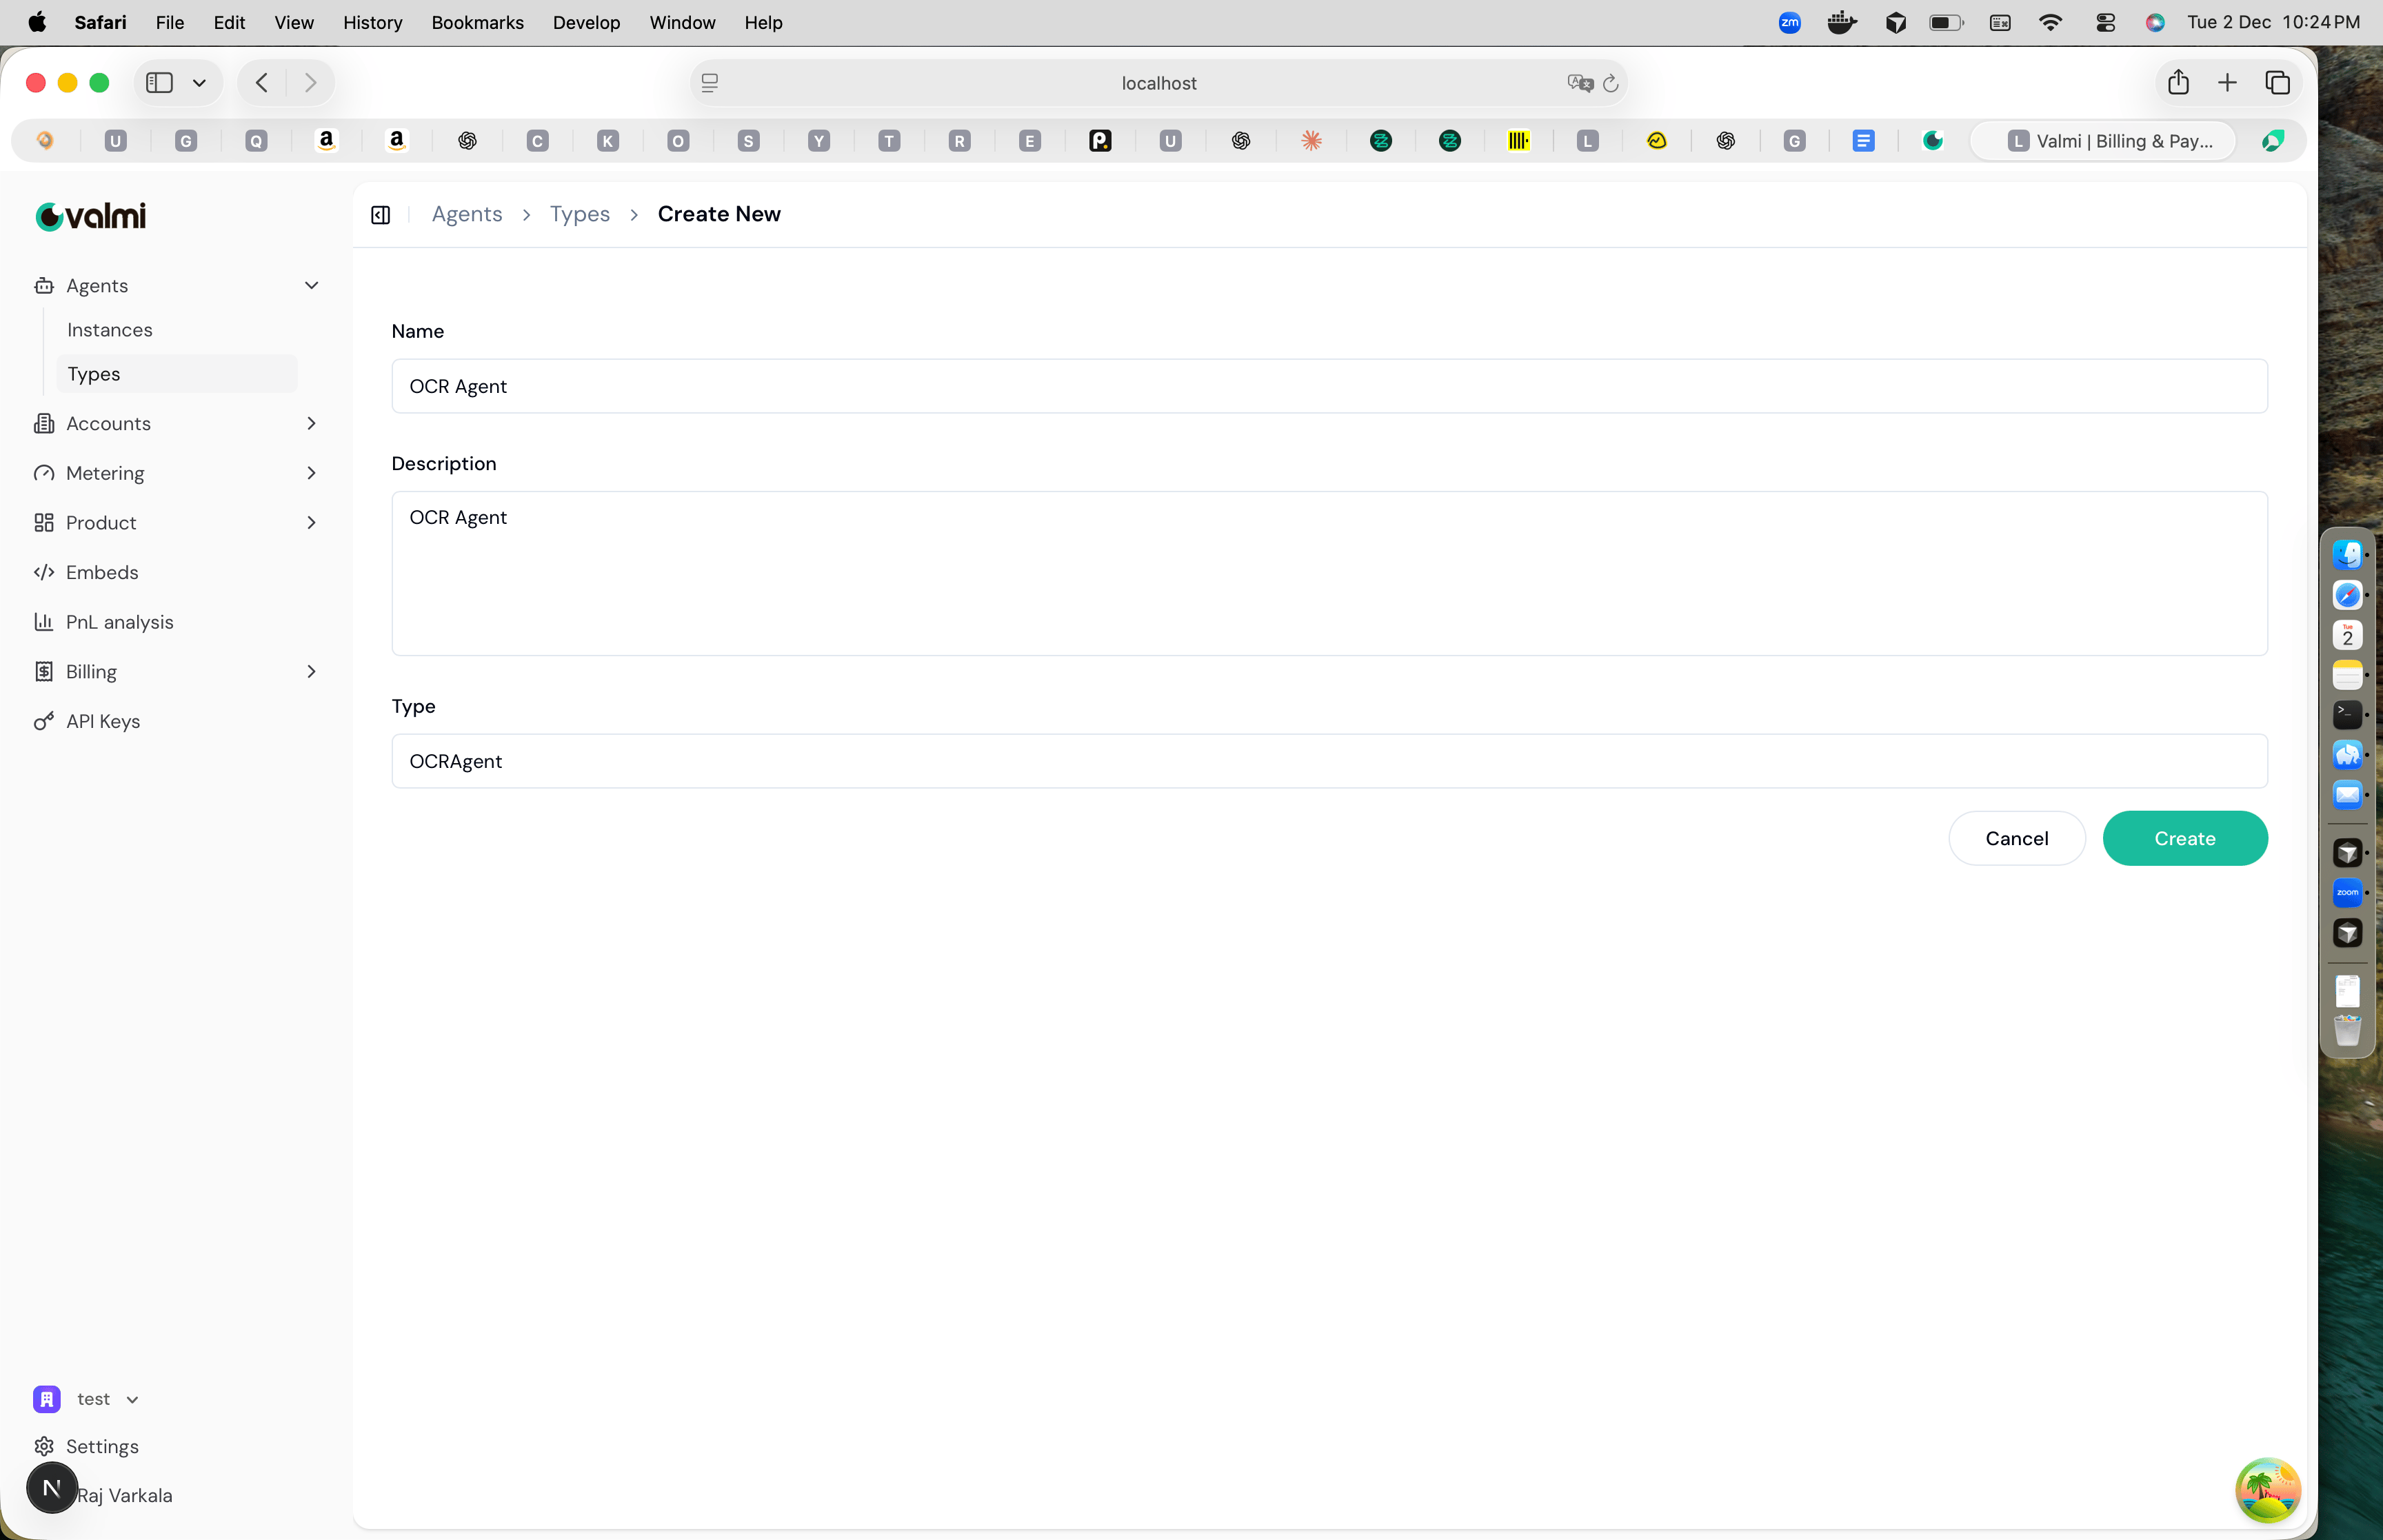 Once you create the agent type, it's ready to use. You can create multiple instances from a single agent type.
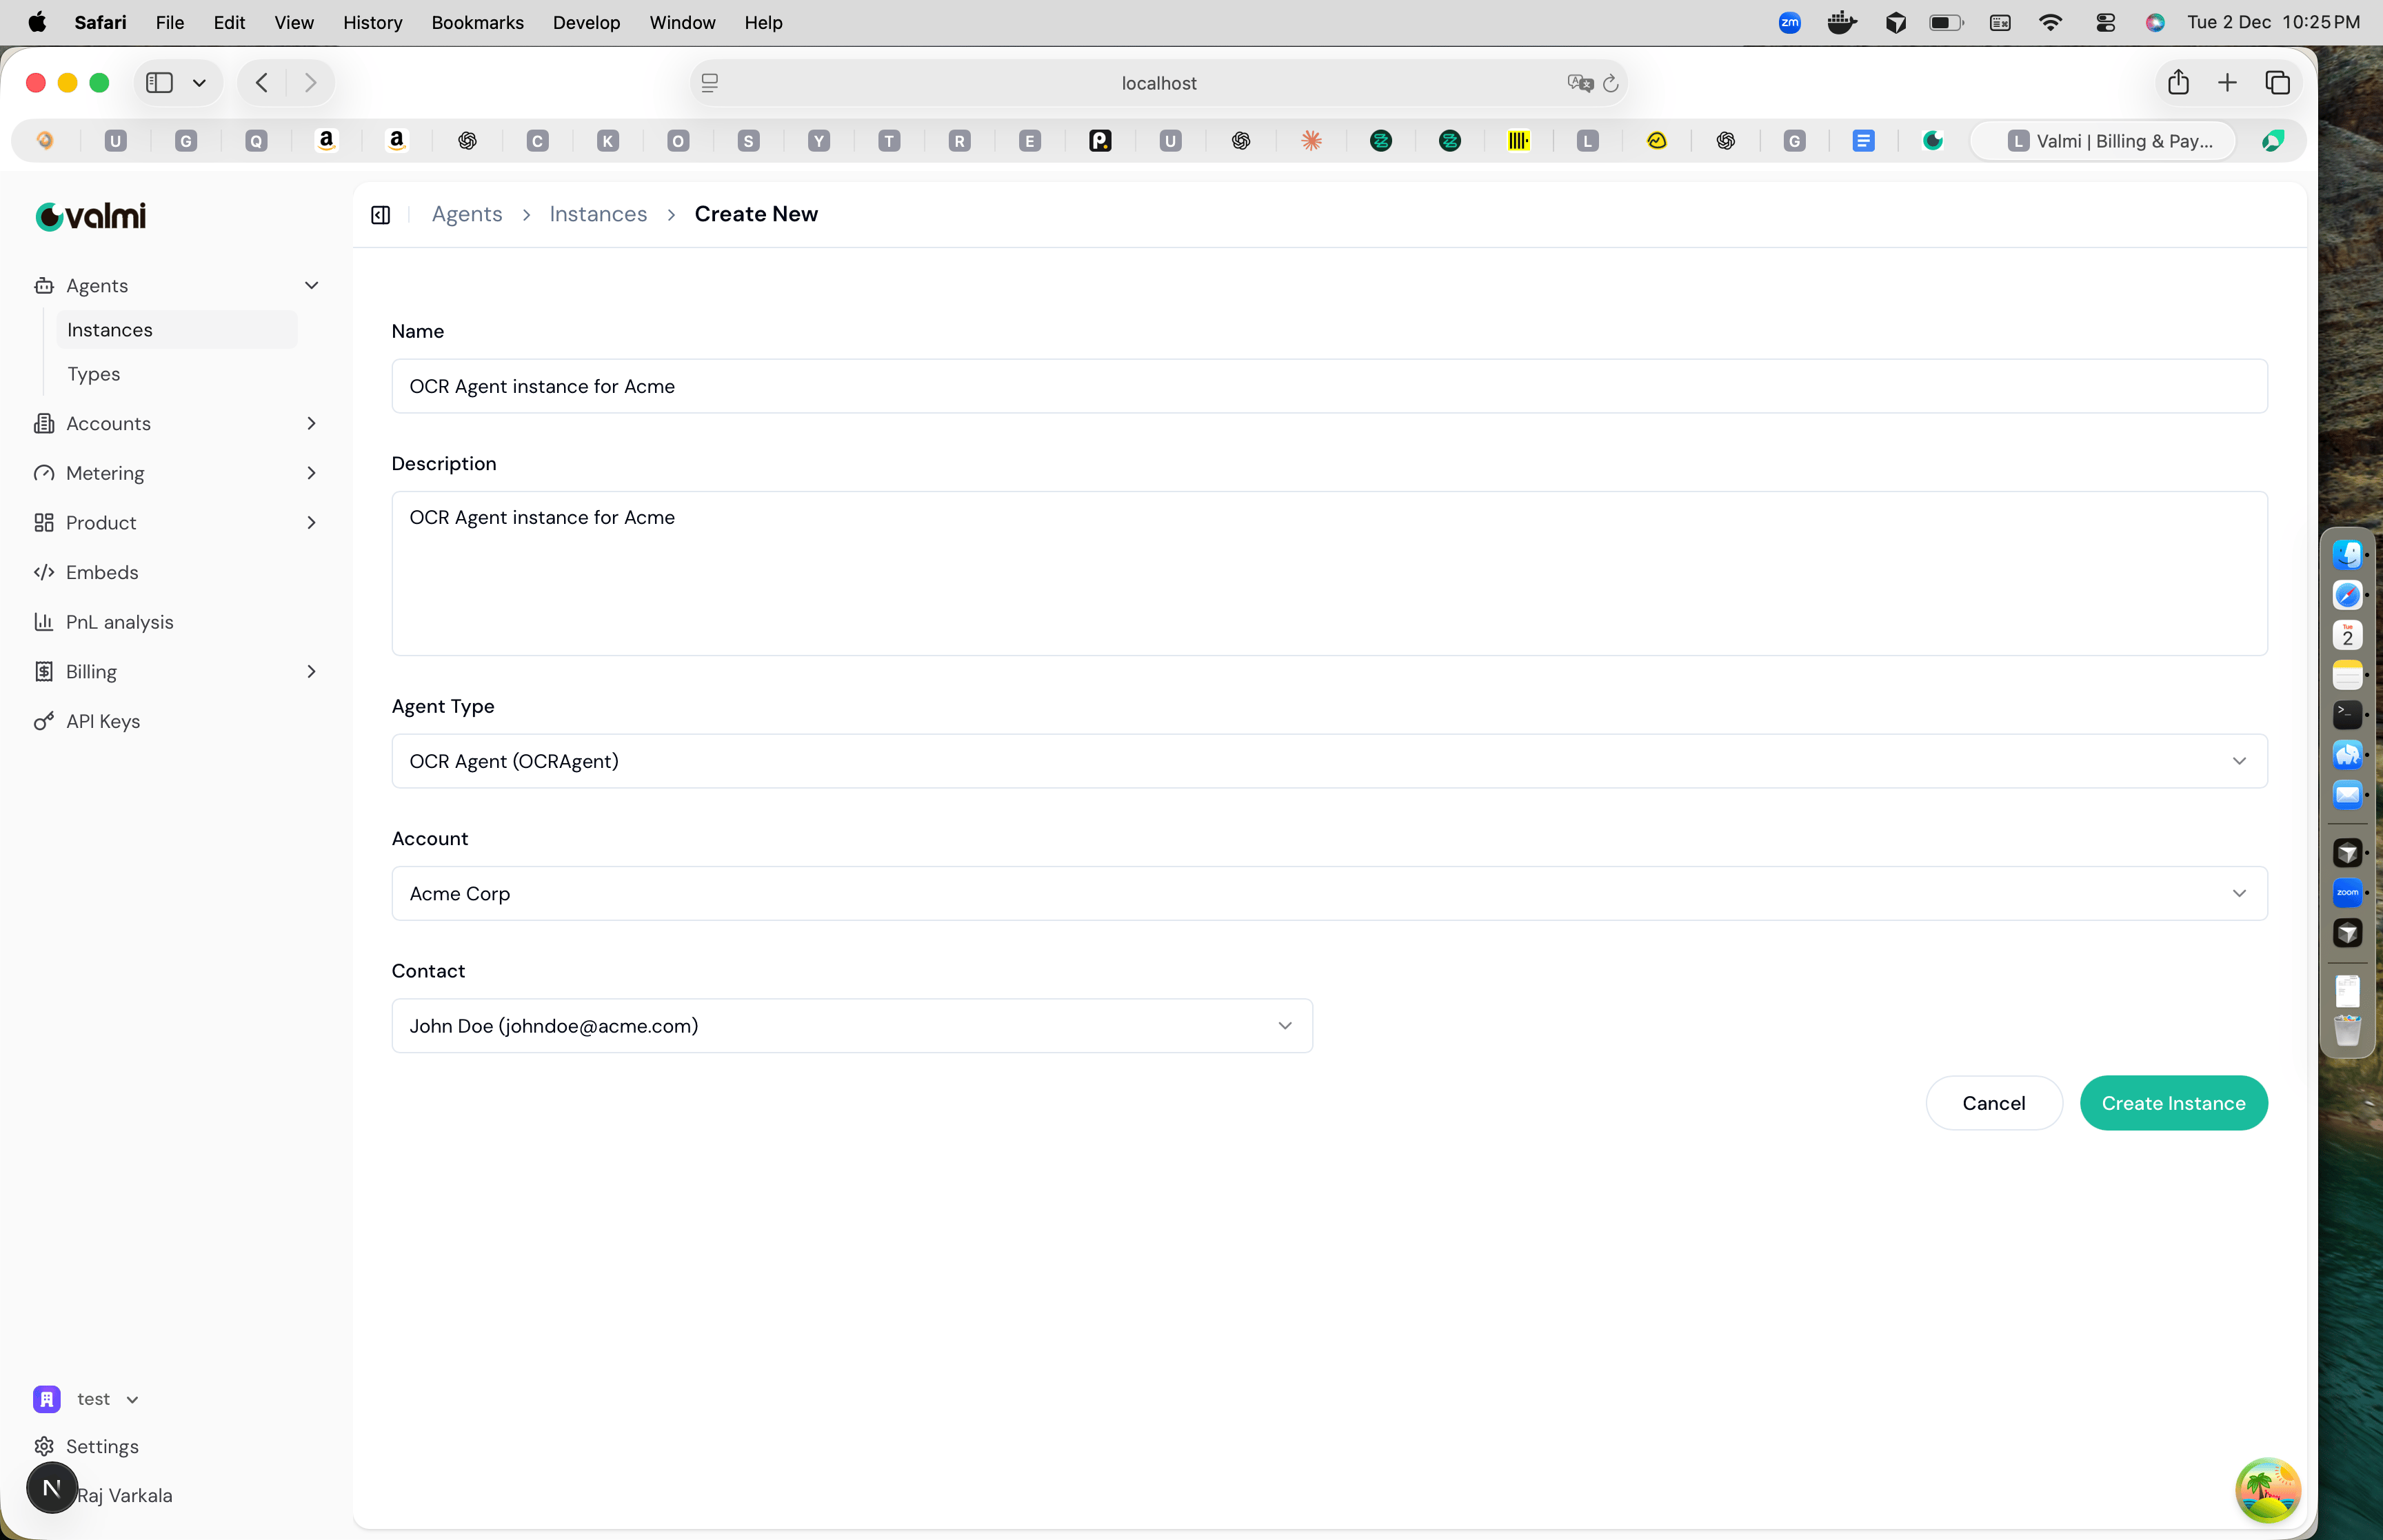
## Step 2: Create Agent Instance
An agent instance is a specific deployment of your agent type. This is where your agent actually runs and sends usage data.
Navigate to **Agents > Instances > Create New**. Fill in the instance details. Give it a name like "OCR Agent instance for Acme" and select the agent type you created. You can also associate it with an account and contact if you have those set up.
Once you create the agent type, it's ready to use. You can create multiple instances from a single agent type.
## Step 2: Create Agent Instance
An agent instance is a specific deployment of your agent type. This is where your agent actually runs and sends usage data.
Navigate to **Agents > Instances > Create New**. Fill in the instance details. Give it a name like "OCR Agent instance for Acme" and select the agent type you created. You can also associate it with an account and contact if you have those set up.
 When you create the instance, you'll receive a secret token. This token identifies which instance is sending events. Keep it secure.
## Step 3: Integrate SDK
Install the Valmi Value Python SDK and configure it with your instance's secret token.
First, install the SDK:
```bash theme={null}
pip install valmi-value
```
Then configure the secret token when initializing the Value client. Set the `VALUE_AGENT_SECRET` environment variable to your instance's secret token:
```python theme={null}
import os
from value import initialize_async
# Set the secret token via environment variable
os.environ["VALUE_AGENT_SECRET"] = "agent_abc123xyz"
# Initialize the client
value = await initialize_async()
```
Or import ValueClient and pass the secret directly during initialization:
```python theme={null}
from value import ValueClient
value = await ValueClient.initialize_async(secret="agent_abc123xyz")
```
Once configured, the client automatically uses this token for all actions you send. Start sending actions from your agent code and the SDK will track usage automatically.
## Step 4: View Live Metering
Once your agent is running and sending events, you can see the data in real-time.
Navigate to **Metering > Live Data**. Select your agent instance from the dropdown. You'll see a live stream of all actions as they happen, with details like timestamps, action IDs, and metadata.
When you create the instance, you'll receive a secret token. This token identifies which instance is sending events. Keep it secure.
## Step 3: Integrate SDK
Install the Valmi Value Python SDK and configure it with your instance's secret token.
First, install the SDK:
```bash theme={null}
pip install valmi-value
```
Then configure the secret token when initializing the Value client. Set the `VALUE_AGENT_SECRET` environment variable to your instance's secret token:
```python theme={null}
import os
from value import initialize_async
# Set the secret token via environment variable
os.environ["VALUE_AGENT_SECRET"] = "agent_abc123xyz"
# Initialize the client
value = await initialize_async()
```
Or import ValueClient and pass the secret directly during initialization:
```python theme={null}
from value import ValueClient
value = await ValueClient.initialize_async(secret="agent_abc123xyz")
```
Once configured, the client automatically uses this token for all actions you send. Start sending actions from your agent code and the SDK will track usage automatically.
## Step 4: View Live Metering
Once your agent is running and sending events, you can see the data in real-time.
Navigate to **Metering > Live Data**. Select your agent instance from the dropdown. You'll see a live stream of all actions as they happen, with details like timestamps, action IDs, and metadata.
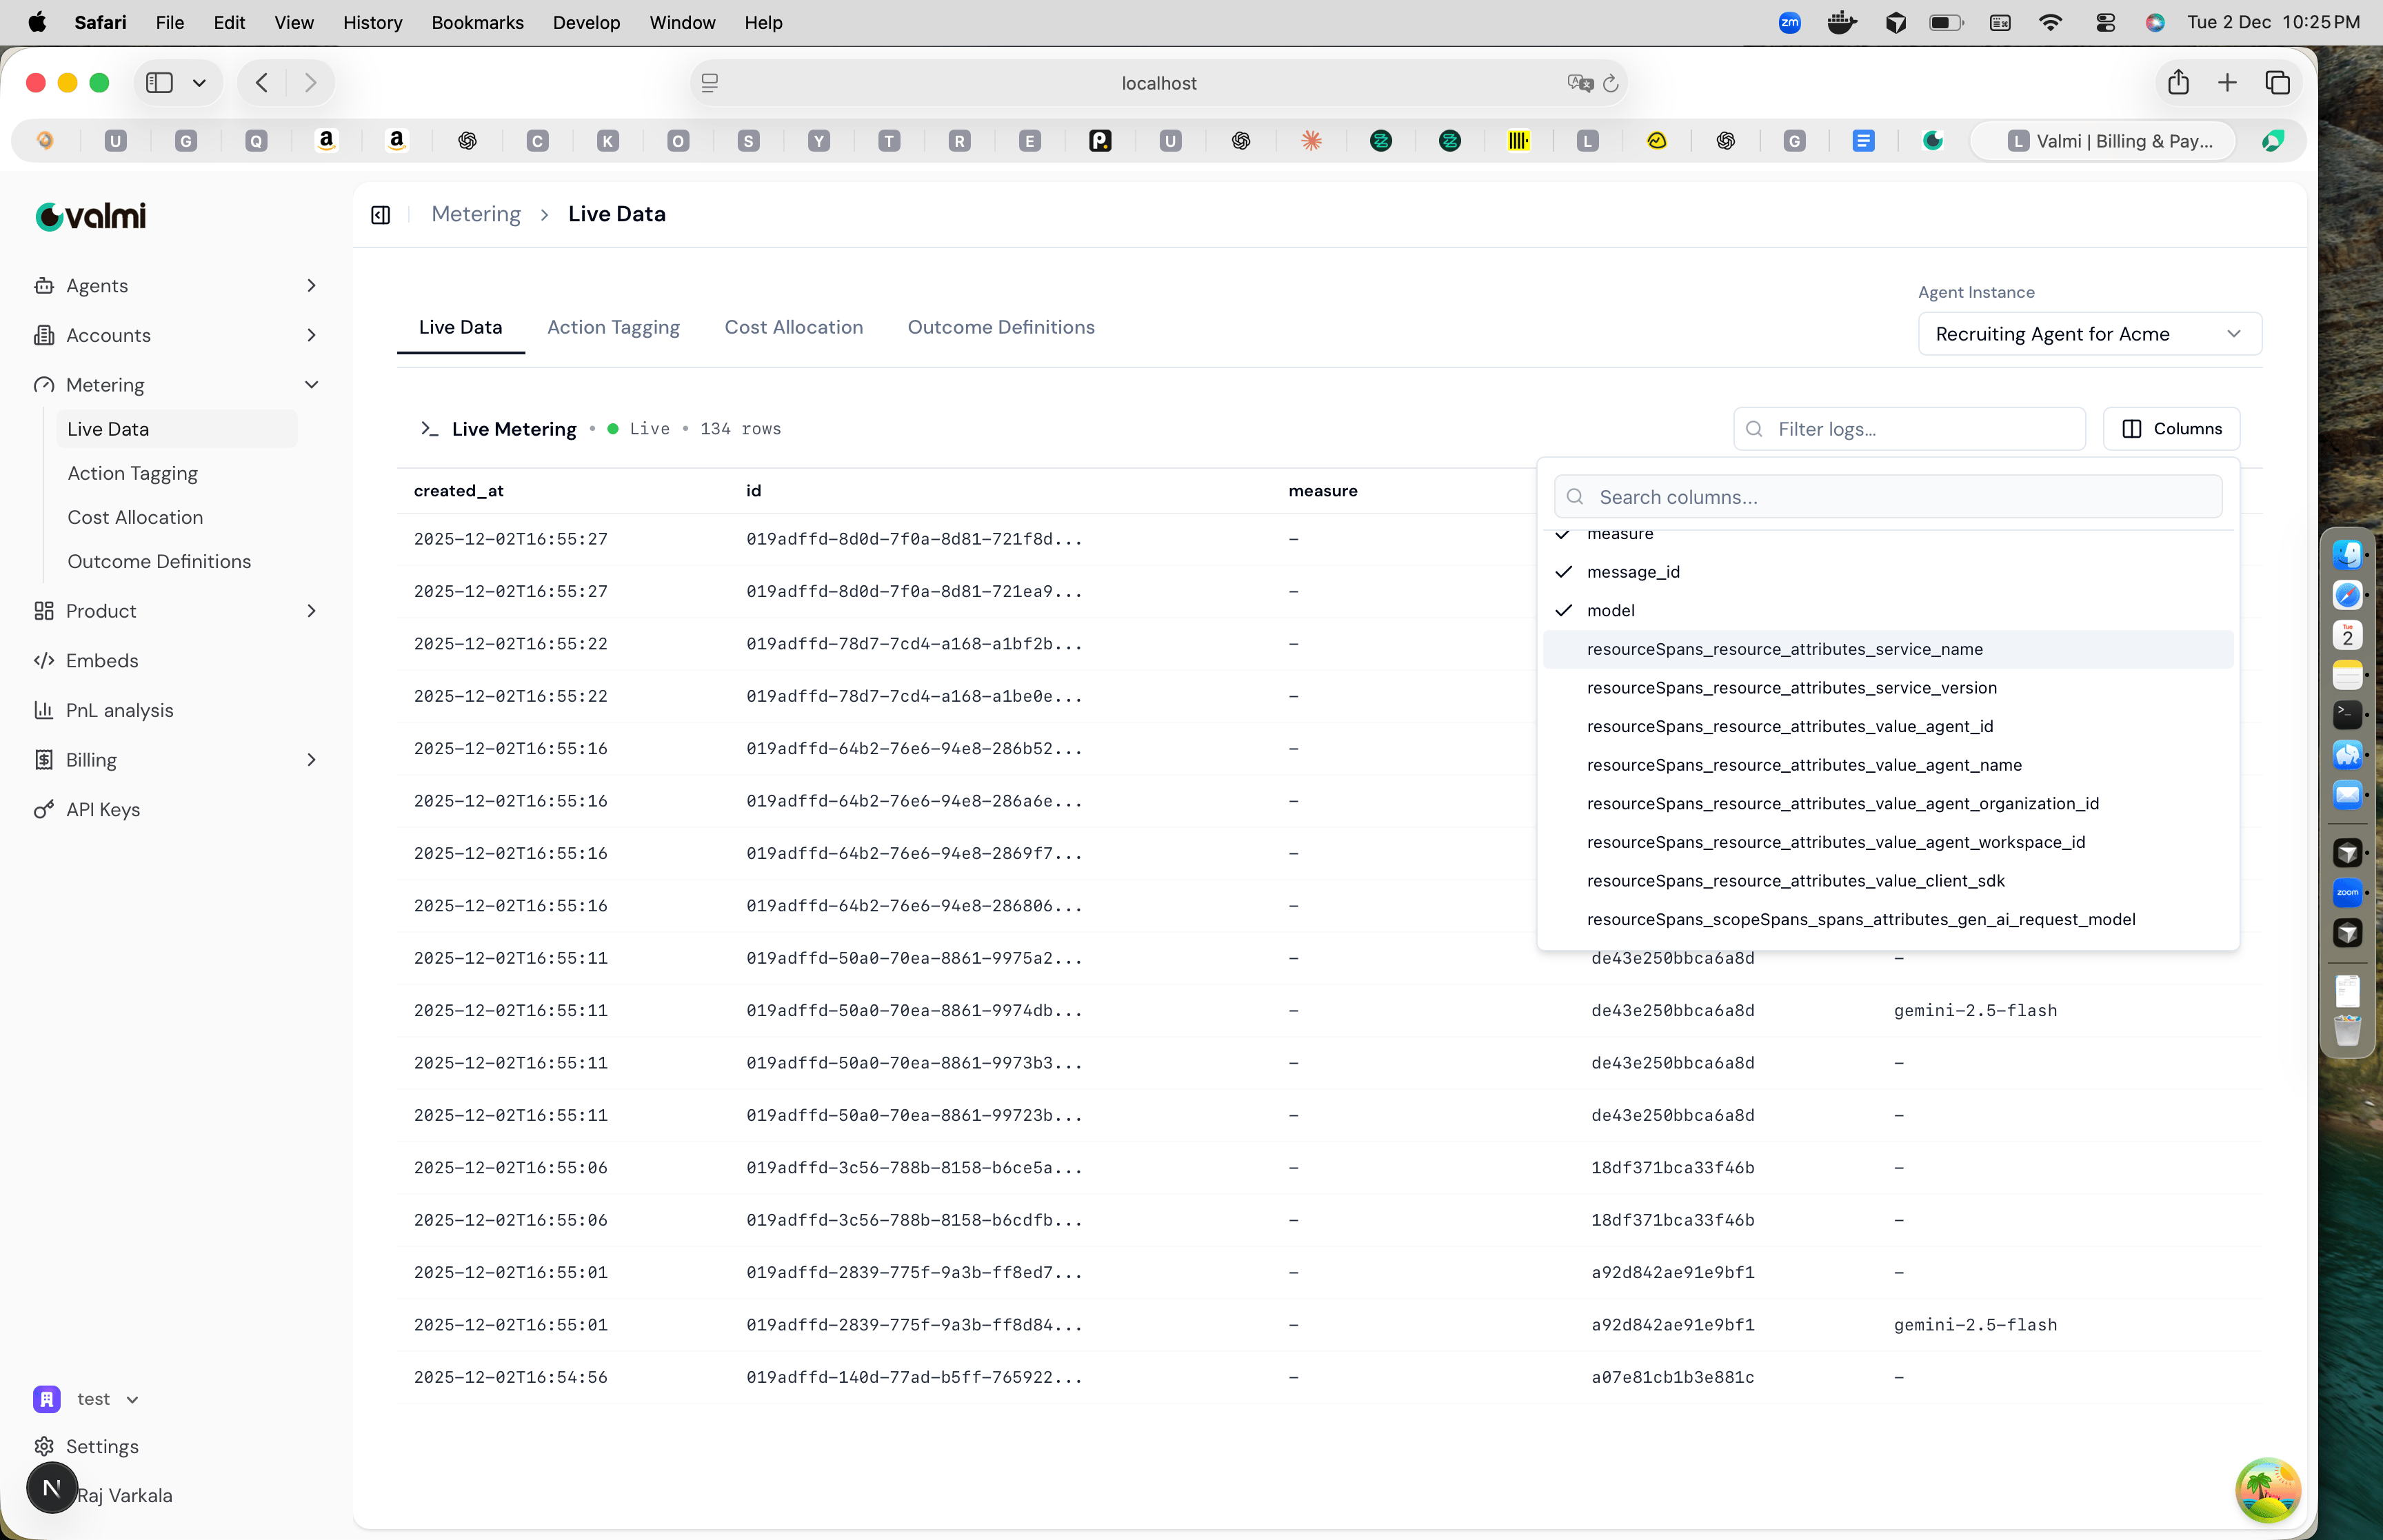 The live data view shows events as they arrive, with columns for created\_at, id, measure, and other metadata fields. You can filter the data, customize which columns are visible, and see usage happening in real-time.
That's it. You're now tracking usage for your agent. The data you see here is what gets used for billing, cost allocation, and profitability analysis.
The live data view shows events as they arrive, with columns for created\_at, id, measure, and other metadata fields. You can filter the data, customize which columns are visible, and see usage happening in real-time.
That's it. You're now tracking usage for your agent. The data you see here is what gets used for billing, cost allocation, and profitability analysis.